
Jan's Working with Presentations
Basics: Interface: Views: Masters
The way your slides and print-outs look is largely based on your Masters. A Master controls the default look for the layout of a slide or a print-out. This includes backgrounds, placeholders, fonts, slide transitions, text animations, and more.
Editing the Master or applying a new Master, changes all the slides or pages in the presentation that use that Master. Cool trick! Masters do for presentations what styles do for documents in Word and Excel.
Versions of PowerPoint since 2002 allow you to use more than one theme, and therefore more than one Master slide, in the same presentation.
Examples: Default Slide Master for different Themes
Masters are used for...
- Slide Master: Default slide plus a set of layouts, which can differ from the Slide Master itself
- Notes Page Master: How a Notes page prints
- Handout Master: A set of print layouts with different numbers of slides on a page
Why use a Master?
Consistency! By using a Master, you can easily keep important features of your slides and handouts the same - logo always in the same spot, titles and text line up neatly, same background, same fonts, same animations and transitions. Of course, you can change an individual slide when the defaults don't work well for that slide.
What can you control with a Master?
 for Slide Master layouts
- Which placeholders appear - title, text, footer, date, slide number
- Placeholder size and location
- Background image or color
- Objects to repeat on each slide
- Formatting for placeholder - border, background
 Formatting for text in placeholder
- Default transitions
- Default animations
 for Handout Master
- Which placeholders appear - header, footer, date, page number
- Additional images, text boxes, objects
-
 for Notes Page Master
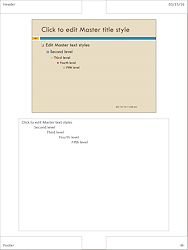
- Which placeholders appear - header, date, slide image, body, footer, page number
- Size and location of slide image
- Size and location of Notes body placeholder
- Formatting for notes
You can, of course, delete, move, and resize the placeholders on the Master. You can add images and other objects that you want to show on every slide or handout/notes pages.
Example:
![]()
Slide Master - default Date, Footer, and Number areas

Example: after defaults were adjusted on the Slide Master
What is a placeholder?
A placeholder is a special text box that PowerPoint creates based on your choices in a Master.
 PowerPoint has a set of
default placeholders. You cannot add to the list.
PowerPoint has a set of
default placeholders. You cannot add to the list.
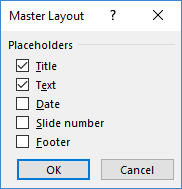
The Slides Master ribbon tab shows a check box for Title and Footers. The Master Layout dialog shows all of the parts. The Handouts Master and Notes Master ribbon tabs show check boxes directly on the ribbon.
Just check the box to show the placeholder or uncheck the box to hide it. You cannot change a normal text box into a placeholder.
PowerPoint uses only the text in the Text placeholder on slides to create the outline for the presentation. Text in a text box that you added to a slide yourself will not be shown in the outline.
![]() Points
of Confusion: Placeholders
Points
of Confusion: Placeholders
- Different sets of placeholders: Slides and printed pages (Handouts and Notes) can all show a header, footer, date, and a number - slide number or page number. These placeholders are set separately in the Slide Master, Handout Master, and Notes Master. They do not have to be the same. The number will be the slide number in the Slide Master and a page number in the other masters.
- Page Setup dialog overrides Handout Master and Notes Master: You can turn off display of these placeholders in the Page Setup dialog. You can also create or edit the text for Header and Footer using the Page Setup dialog. It can get confusing!
| |
Step-by-Step: Master View |
|
| What you will learn: | to switch to Master view to view layout Masters to view Handout Master to view Notes Master |
Start with:![]() , issues4-Lastname-Firstname.pptx from your Class disk
, issues4-Lastname-Firstname.pptx from your Class disk
Open Slide Master View
- If necessary, open issues4-Lastname-Firstname.pptx from your Class disk and show slide 1.
-
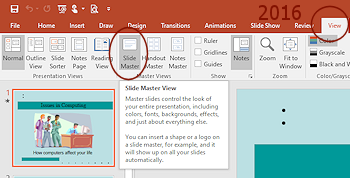 Switch to the View ribbon tab and click on the button Slide Master.
If you hover over the button, a screentip tells you what the button will do.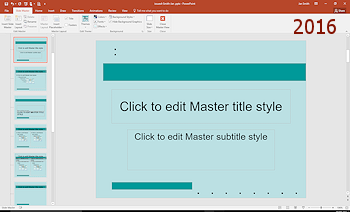 What changes:
 - The ribbon adds a new tab, Slide Master, and makes it the current tab.
- The Slide pane shows the layout for the current slide.
- The thumbnails at the left show thumbnails of the layouts available for this Master.
 Point
of Confusion: The ribbon tab for a master (Slide Master, Handout Master, Notes Master) appears at the left, between the File and Home tabs, instead of at the right end of the ribbon like
other context tabs. Only one Master tab can show at a time.
Point
of Confusion: The ribbon tab for a master (Slide Master, Handout Master, Notes Master) appears at the left, between the File and Home tabs, instead of at the right end of the ribbon like
other context tabs. Only one Master tab can show at a time. - Scroll the thumbnails.
This presentation has a lot of layouts that are not actually used by any slide in the presentation. They came from the template that was used to create the presentation. The Default Slide Master is at the top. Notice that the other layouts are shown indented. They inherit features from the Default Slide Master. -
Inspect the new Slide Master ribbon tab.


 PowerPoint 2013, 2016: Does not have a Page Setup tab group but gains a Slide Size button. Colors, Fonts, and Effects moved into the Background tab group. Page Setup is in the Backstage View for Print.
 Experiment: Slide Master Formatting
It makes a difference what is selected in the Navigation pane! Changes to the Default Master slide affect other masters. But, a change to a particular layout does not affect any other layout or the Default Slide Master itself.
- Click on the thumbnail at the top to be sure the Default Slide Master is selected.
- Click on a different theme from the Themes button while the Default Slide Master is still selected. (There is no Live Preview.)
What changes?
Some themes may add new images as well as using different fonts and colors. The slide formatting contained in a theme can be quite elaborate. - Inspect the other layout thumbnails.
How did other layouts change when you changed the Default Slide Master? - Try other themes.
Some will have a Title slide that is very different from the regular slides. Can you guess which one by looking at the gallery of themes? - Try different background styles, colors, fonts, effects using those buttons.
Which layout masters change? - Undo all your changes!
If the Undo list is not long enough, close the presentation without saving changes and reopen it and switch to Slide Master view.
Viewing Slide Master Layouts
To view or edit a layout master, just click its thumbnail in the Navigation pane. The Slide pane will then show a large view of that layout master.
-
 In Slide Master view, move your mouse over the first thumbnail at the left
and let it hover a moment.
In Slide Master view, move your mouse over the first thumbnail at the left
and let it hover a moment.
A screen tip pops up that shows which Master this is (Default Design Slide Master) and what slides actually use it (slides 1 - 5). Very useful when there are two or more themes being used in the presentation!
- Hover over on each of the layouts in
the column of thumbnails below the first one.
(You may need to scroll the thumbnails to see all of them.)
 Check actual slides when changing a Master: When
you make changes to a Master, make a note of which slides in your presentation use it and then
go look at them. You need to be sure your changes are happy ones on all of the slides that use that Master.
Check actual slides when changing a Master: When
you make changes to a Master, make a note of which slides in your presentation use it and then
go look at them. You need to be sure your changes are happy ones on all of the slides that use that Master.
-
 Click on the first
thumbnail.
Click on the first
thumbnail.
The Default Slide Master appears in the Slide Pane.You can see the formatting for a slide title and for 5 bullet levels.
-
 Click on the second thumbnail - Title Slide.
The Slide Pane shows the layout - a placeholder for a title and one for a subtitle.
-
Similarly, click on each of the layout thumbnails to see what is different about the layout.
Is it clear for what each layout would be useful?
 Content icons: In the middle of some layouts are icons for types of content that you might want to insert - tables, charts, SmartArt graphics, pictures, online pictures, videos. These are shortcuts to the dialog needed to create or insert the object. You must add a Content placeholder to a layout to get these shortcut icons.
View Handout Master
-
 On
the ribbon on the View tab, click on Handout Master.
On
the ribbon on the View tab, click on Handout Master.
The Slide Master ribbon tab closes and the Handout Master ribbon tab opens.Only one Master view can be open at a time.
The Handout Master tab does not have quite the same choices as the Slide Master ribbon tab.
Both have tab groups Edit Theme and Background and a Close Master View button.

 PowerPoint 2013, 2016: Does not have a Page Setup button and again moves Colors, Fonts, and Effects to the Background tab group.
 - Click the button Slides Per Page to open
a list of all of the choices.
-
Click on each choice in turn and see what the Handout master looks like.
The Handout Master changes to show where the slides or outline will sit on the page. You cannot move or resize the placeholders.
There is not much you can do here except add a text box or image and select what placeholders you want at the top and bottom of the page - Header, Date, Footer, Page Number.
- Change the orientation to Horizontal with the Handout Orientation button on the ribbon and select each of the Slide Per Page choices again.
Does the Handout Master change the way you expected? - Close the view with
the Close Masters View button
 on the
ribbon.
on the
ribbon.
You are returned to Normal view.
View Notes Master
-
 On
the ribbon click on the View tab, click on Notes Master.
On
the ribbon click on the View tab, click on Notes Master.
The Notes Master appears with its own ribbon tab.
-
Experiment: Notes Page
Resize the slide image and the area for notes for the print-out. These changes do not affect the slide or handouts.You could add logos or pictures that you want to print on every Notes page.
-
 Right click a blank area on the page and then click on Notes Master Layout.
A dialog appears with check boxes for the placeholders that can appear on this Master. The ribbon also has the same check boxes.
In some versions you can only check an empty box in this dialog. You cannot uncheck a box. Strange.
The Slide and Handout Masters also have a Master Layout on their right click menu with a list of the placeholders available for that Master. For slides, the Default Slide Master must include a placeholder for that placeholder to be available in layouts.
Remove placeholder from a layout: Uncheck its box on the ribbon
or select the placeholder in the Master View and press the DELETE key on your keyboard. -
Close the view with the Close Masters View button
on the
ribbon.
Do not save changes!
|
|
| © 1997-2017 Jan Smith All Rights Reserved |
Site Map What's New |
Privacy Policy Terms of Service Copyright Acknowledgements |
~~ 1 Cor. 10:31 ...whatever you do, do it all for the glory of God. ~~
Last updated: March 22, 2017