 |
Step-by-Step: Brochure Cover |
 |
What you will learn: |
to change text direction in a text
box
to align vertically
to add a bottom border
to add a
picture on top of a text box
|
Start with: 
 ,
brochure-tahiti.doc
(from Doc Template lesson)
A sample document, images, and replacement text are in your
resources files in the tahiti
folder.
Change Text Direction
-
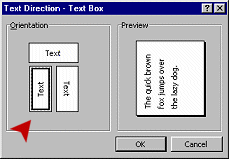 Click in Text Box 3.
- From the menu select |
- Click on the label on the left with text running from bottom to top.
 The alignment buttons on the toolbar change to match the new orientations for text.
The cursor shape changes to
 which matches the new direction
Format Cover Text
- With the
cursor in Text Box 3, set the paragraph style to
Normal
 .
.
- Type the
following two lines in Text Box 3:
World Travel Inc.
Tahiti
-
 Format World Travel Inc. like you did for the letterhead in Project 2. (Hint: use
the Font dialog. Shadow
is not available on the toolbar.)
font: Matura MT Script Capitals
size: 36
color: Green
Shadow
-
With the cursor
in the line World Travel Inc. ,
click the
button
 Align
Bottom
- Format Tahiti with:
font: Times New Roman
size:
36
Bold
Italics
- While Tahiti is selected,
click on the button
 Align Top.
Add Bottom Border
A border does not have to go all the way around an object. You can use
the border feature to create a fancy underline or divider.
-
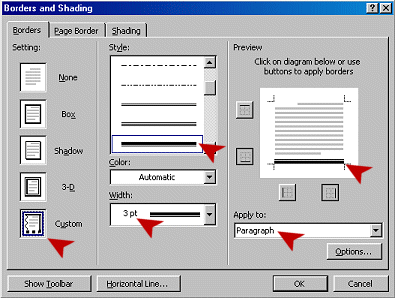 Move the cursor to the line
World Travel Inc .
- From the menu
select | |
.
- In the Style list
choose the
double line which has a wide line at the top and a thin line below it
 .
.
- Set Width to
3 pt.
- Click on the Setting
Custom at the left of the dialog.
-
 Click in the preview at the right on the bottom edge. (If all edges are
dark to
start with, click on the ones you don't want to remove them.)
- Set Apply to:
Paragraph.
- Click on
OK.
Set Paragraph Spacing
You can get the exact space you need before and after your
paragraphs using the Paragraph dialog. For this brochure cover you
need some space for an image. Text wrapping would move the text around an
image inserted in the text box, but the image is not going to be
in the text box with the text. You could use blank lines, but it
is easier to get the exact space you need with paragraph spacing.
-
 Right click on the line World Travel Inc. . From
the popup menu select
Is
missing from your popup menu? Perhaps your click missed. Or did
you click in an area
that was underlined with the squiggle for a spelling or grammar error? Then you will
see only choices for grammar or spelling in
the popup menu. Whoops. Not what you want right now. First check carefully that you don't have an extra comma, period, or space or perhaps a mis-spelled word in the line. Fix any problems. If there is not a real problem, choose and right click
again.
-
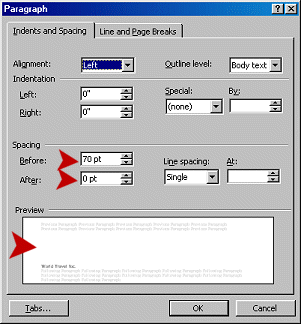 Set Spacing Before: to 70 pts and
Spacing After: 0 pts
The preview shows what this choice does to
the paragraph spacing.
 You are making space to have room for
an image.
If
the word Tahiti is partly cut off at the bottom, check its
paragraph style. The header styles include extra line spacing, which will push Tahiti at least partly out of the text box. Just change the style for the line to Normal.
Add Picture
You are going to insert an image as
part of the brochure cover. This simple task is a bit tricky because of
the text boxes. They lie above any text or images that are placed directly
on the page. If you are not careful the image will be underneath
a text box. Hide and Seek time!
If the cursor is in the text box when you insert your image,
the image will be an inline image. Such
an image is treated like a character
on the line. You can't drag it around. You cannot change this with the Format
Picture dialog. Thus a very simple action (well, it should be
simple!) becomes quite confusing.
 Word 97, unlike earlier versions, inserts images by default as floating images, which can be dragged, rather than as inline images. But inside a text box things are different!


 Word 2000/2002/2003 does not handle the inserted image the same way Word
97 does. The new way is quite awkward!
- Click in a blank area of the page that is not in a text box. (Be sure you aren't still in a text box!)
- Set Zoom
to Whole Page so you can see what
is going on.
- From the menu select | |
-
Choose as your picture the image travelbar.wmf in the tahiti folder in your resource files. The path is:
c:\My Documents\complit101\words\tahiti\travelbar.wmf
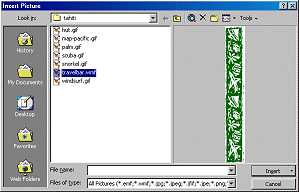 if you used the
default location for the resource
files. The picture is inserted, but where depends on your version of Word.
-
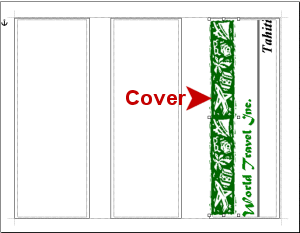 Drag the image over to Text Box 3 and position it in the
top left corner of the text box.
- Enlarge the image by dragging the
bottom right corner until the graphic stretches from the top to the bottom of
the text box.
If your image is the same height as the text box or larger, the image hides part of the line around the text box. You will remove the line later, so don't worry about it now.
-
 Save
to your Class disk in the folder word project3 as brochure-tahiti2.doc
 How to handle a full disk


The image is nowhere to be seen but the cursor is blinking in the middle of Text Box 1! What ever has happened??
If you are using Word 97:
The image appears at the left of your page on top of the text box. If it's not showing at the left, Undo. Insert again. In the Insert dialog be sure that the checkbox Float over text is checked.