
|
Step-by-Step: Align & Space Images
|
 |
| What you will learn: |
to align image to left
to add space around image
to stop text wrapping
to center image |
Start with:
 ,
hector11.htm, resource files
The bottom part of Hector's page looks bare. You will
insert some images to make it more interesting and then set the alignment
and spacing for a more attractive look.
Insert Image
-
 Save the page with the name hector12.htm
in the web folder of your Class disk.
-
 In
Normal view, put your cursor at the beginning of the paragraph under
Travel.
-
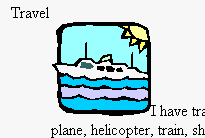 Insert
the image travel.gif that is in the
hector web on your Class disk.
The bottom of the image lines up with the baseline of the text. This
does not look very nice but it is a start.
Align and Space Image
You will align the image to the left margin and add some white space
around it.
-
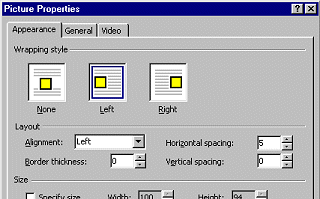 Right
click on the new image and from the popup menu select
.
- If necessary, click on the Appearance tab.
- Under Wrapping style, select Left. This
will add align="left"
to the image tag so that the text will wrap around the image.
-
 Set
Horizontal spacing to 5, which means 5 pixels.
- Click on OK.
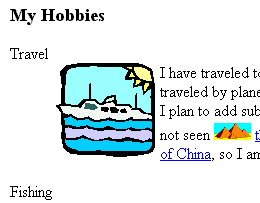
The text now wraps around the image, but is moved a short distance away.
Success!
- With the image still selected, switch to HTML view and
inspect the image tag to see the added attribute. The whole IMG
tag should be highlighted.

- Switch back to Normal view.
Stop Text Wrapping
The illustrations for the next steps were captured in a
800 x 600 window. At different resolutions and window sizes, the text
wrapping can be quite different.
You will use the <br> tag
with the clear attribute to make sure the
wrapping is right for all window sizes.
- Resize the FrontPage window, if necessary, to be
approximately 800 x 600.
- At the left of the paragraph that follows the heading Fishing,
insert the image fish.gif that is in
your hector web.
-
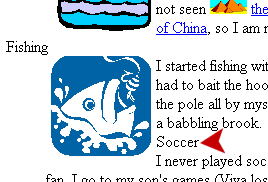 Set
the same Alignment and Spacing settings as before: Left and
hspace= 5 pixels.
If your window is about 800 x 600 or wider, the next heading,
Soccer, is now sitting beside the fish image instead of being at the
left margin. Not at all appropriate!
- Move your cursor to the left of the heading Soccer.
 Click
in the word Soccer first and then press the Home key.
-
 From
the menu select | The dialog Break Properties opens
-
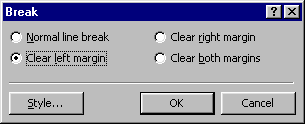 Select
Clear Left Margin
and click on OK.
The text moves down until it clears the image entirely.
 If you insert a Normal
line break, you may get what looks like the same result, depending on
your window size. A Normal line break just drops down one line. That
does not guarantee that your text will be at the left margin.
-
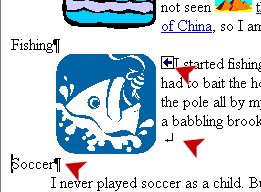 If
necessary, click on the
 Show
All marks button. Now you can see where the breaks are and where the
image anchors are. The symbol
 shows where you inserted the break.
- Turn off the marks.
When marks are showing, the Normal view is a lot less WYSIWYG.
Spacing changes a lot to make room for all the marks. You will want to
leave the marks off except when you really need to see them.
Line Wrapping in Large Windows
Viewing your HTML pages in different window sizes can
often reveal unhappy surprises. Enlarging the window may make images wrap
in very unhappy ways. You can (and should!) fix the problem even if your
own monitor cannot hold a window large enough to show the problem.
-
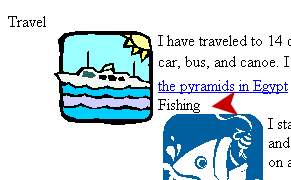 Enlarge
the FrontPage window until the Fishing heading wraps beside the
image travel.gif .
The larger the window, the more obvious the problem.
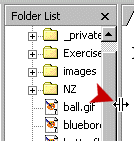 (You
can drag the right edge of the Folder List to the left to give even more
horizontal space or even close it for now.)
- Place your cursor at the end of the sentence
...I am not done with traveling yet.
- Insert a break to clear to the left margin.
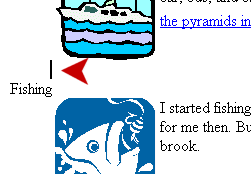 There
is an extra line above the heading Fishing. Can we get rid of it?
- With the cursor just above Fishing, press the Backspace key.
Whoops! That deletes the line break! Let's try a different position for
the break.
-
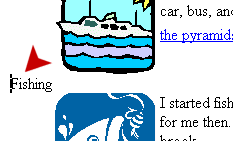 Put
your cursor at the left of the word Fishing and insert a
Clear left break. Aha! Now we have the spacing
we wanted.
More Images
- Show the marks.
-
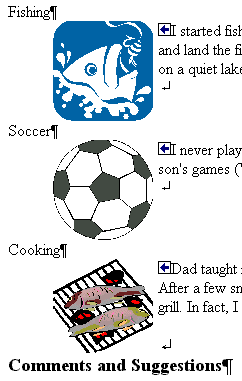 Insert
the image ball.gif from your
web folder to the left of I
never played soccer as a child.
- Set the image properties the same as you did for
fish.gif.
- Insert a break of the type Clear Left
Margin at the left of the heading Soccer
to make sure it will not slide up beside the fish at a large window
size.
- Insert the same kind of break for Cooking.
- Insert the image grill.gif at the
left of the paragraph Dad taught me early that...
and set the image properties the same as you did for
fish.gif.
- Insert a break to Clear Left
Margin in front of the heading Comments and
Suggestions to make sure it stays at the left margin, too.
-
 Save your page. [hector12.htm]
Other Alignments
- Open the Image properties for the mailbox image at the
bottom of the page.
- Experiment by applying each of the alignment choices
in turn to this image. Which ones are noticeably different?
- Experiment by applying different horizontal and vertical
spacing.
-
 Apply
the same settings for this image as you used earlier:
Alignment Left
5 pixels horizontal spacing
0 vertical spacing.
-
 Save your page. [hector12.htm]
Center Images
When you choose Center
from the Alignment list, the ALIGN attribute is not added to the IMG tag.
It is added to the paragraph or heading tag that contains the IMG tag.
Awkward!
-
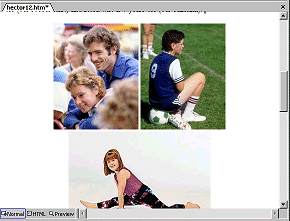 Move
your cursor to the left of the image of Hector and Carla.
- Click on
 the
Center button on the toolbar.
The whole paragraph is centered horizontally, so all three
images move to the center. If your window is still large, this may not
be very obvious.
Resize the window smaller to see the effect.
- Switch to the HTML view. To the left of the image tag for
carla.jpg the paragraph tag has changed from changed from
<p> to
<p
align="center">
- Close HTML View.
-
 Save your page. [hector12.htm]
 Align & Space Images
![]()
![]()