 |
The margins are the blank space between the edge of the paper and the printed
data. You have top, bottom, left, and right margins. The lessons use the default
margins in most cases. The instructions will, of course, tell you to change the
margins if it is necessary.
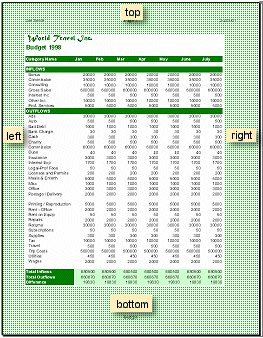
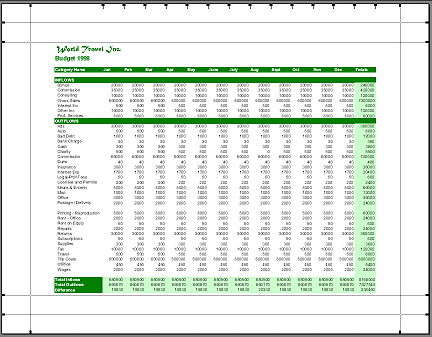
Top, bottom, left and right margins surround the body
of the printed spreadsheet
If you don't use "letter" size paper, you may need to use different
margins to have your documents look similar to the illustrations.
Some printers cannot print as close to the edge of the paper as others. You
may have to make adjusts to your documents if your printer needs extra wide
margins.
|
 |

Where you are:
JegsWorks >
Lessons >
Numbers
Before
you start...
Project 1: Excel Intro
Project 2: Excel Basics
Getting Started

 Regional
Settings Regional
Settings
 Appearance Appearance
 Page Page
 Margins Margins
 Header/Footer Header/Footer
 Sheet Sheet
 Options Options
 Enter/Edit/Clear Enter/Edit/Clear 
Arrange
AutoFill
Finish
Summary
Quiz
Exercises
Project 3: Format & Arrange
Project 4: Groups & Formulas
Project 5: Design
Search
Glossary
Appendix
|
|
 |
Step-by-Step: Setup Margins |
 |
What you will learn: |
what the margins are
to set the sizes for margins in dialog
to resize margins by dragging
how the margins relate to the header and footer
|
Start with:
 (budget.xls from the resource files)
Margins: Dialog
- If
necessary, open budget.xls and then open the Page Setup dialog . [File | Page Setup...]
- Click on the Margins tab. Margin settings are in inches if Regional Settings/Options = English (United States).
[See the earlier page] The Page Setup
dialog does not tell you what the unit of measure is! It just gives
the numbers. There is no place inside Excel to change the
measurement system being used.

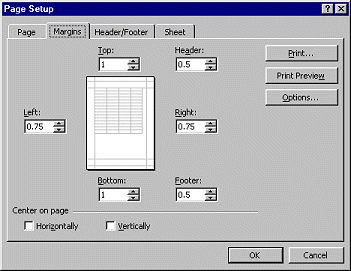
- If necessary, change the margins to match the illustration:
Top = 1, Bottom = 1, Left = .75, Right = .75, Header = .5, Footer = .5
Center on page boxes not checked.
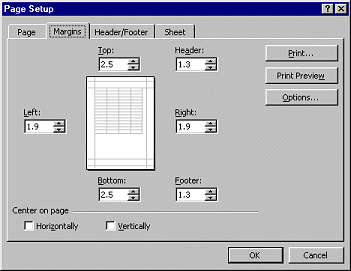
 If
your computer uses the metric system, the default sizes are in centimeters,
like:
- Close the Page Setup Dialog.
Margins: Mouse
- Open the Print Preview with the toolbar button
 . .
- Click on
 the Margins button in the toolbar. This button toggles on and off a set of
dotted lines that mark the margins and the header and footer.
- With the margin lines showing, move the mouse pointer over one of the dotted lines until it turns
into
 the vertical resize shape.
- Carefully hold down the left mouse button. On the Status bar
there is a message about the line you are on and the margin it represents.
- Drag the mouse to change the margin sizes. Have some fun!
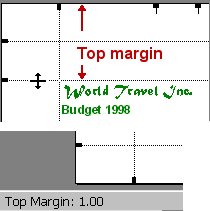
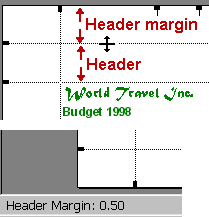
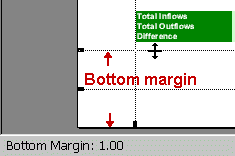
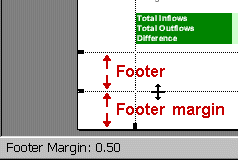
The default sizes for margins (in inches)
 Margins Error: If you set the Header larger than the Top, or the Footer
larger than the Bottom, or if your text size is too big to fit in the
space, your header or footer may print
on top of your data cells. In the illustration below, the header is my
name, formatted to a large font size. Excel will not hide the misbehaving header or footer like Word
does. Your header and footer will print, come what may! The Office Assistant
may offer a tip about this problem, but it won't insist on your fixing it. If the top row or two of your spreadsheet happens to be blank, you won't notice the effect.
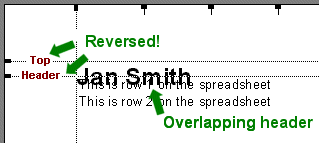
Problem: The Top margin should be bigger than the Header!
 The default
left and right margin for the header and
footer is always .75
" no matter what margins you choose for the rest of the page.
Another strange "feature". The default
left and right margin for the header and
footer is always .75
" no matter what margins you choose for the rest of the page.
Another strange "feature".
- Close Print
Preview.
Center on Page
To make small spreadsheets and ranges print more attractively, you can center
the print area horizontally or vertically or both.
- Open the Page Setup dialog again to the Margins tab.
-
 Click
on the checkboxes to center Horizontally and Vertically. Click
on the checkboxes to center Horizontally and Vertically.
 The preview document on the Margins tab moves to show the change. You
won't notice this centering unless the range that is printed is smaller than the width or height of the page. The preview document on the Margins tab moves to show the change. You
won't notice this centering unless the range that is printed is smaller than the width or height of the page.
 The preview in the dialog
is not a thumbnail of your actual document. The preview in the dialog
is not a thumbnail of your actual document.
- Click on the Print
Preview button to see the Budget sheet. Can you see a
difference?
   
~~ 1 Cor. 10:31 ...whatever you do, do
it all for the glory of God. ~~
Last updated:
02 May 2012 |

![]()