 |
The WSYIWYG interface of
FrontPage makes it much easier to make changes. You can see what you are
doing as you do it!
Styles
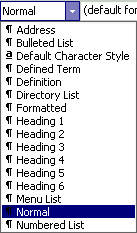 The
default Style box on the Formatting Bar lets you apply an HTML
block element tag to your text. A block element is
one that creates a new paragraph. The
default Style box on the Formatting Bar lets you apply an HTML
block element tag to your text. A block element is
one that creates a new paragraph.
Unlike with Word, you cannot use this box to create your
own styles directly. You must use Cascading Stylesheets (not covered in HTML
Basics). If you open a page that has a CSS stylesheet (like the pages of
this site), the styles in the stylesheet will be shown in the Style list.
|
 |

Where you are:
JegsWorks >
Lessons > Web
Before you start...
Project 1: Browser Basics
Project 2: HTML Basics
HTML Code
About HTML
What You Need
Code by hand

WYSIWYG
FrontPage/FPX

 FrontPage
 OR FPX
Interface
Formatting Bar
Standard
Bar
Views Bar
 Using
FrontPage Using
FrontPage
 Edit Edit
 Text
links Text
links
 Create
web Create
web
Images in HTML
Formatting
Tables
Print
Convert
Summary
Quiz
Exercises
Search
Glossary
Appendix |
|

|
Step-by-Step:Edit in FrontPage
|
 |
| What you will learn: |
to apply a style
to add text
to save as a file on a disk
to use Page Setup to configure for print
to use Print Preview
to print from FrontPage |
Start with:  ,
hector4.htm ,
hector4.htm
Apply a Style
- Change the sentence Here are my hobbies.
to simply My Hobbies
Don't forget
to remove the period of the end of the sentence.
- Put the cursor in the line My Hobbies
.
- From the Style drop-down list select the style Heading 3.
The formatting of the whole line changes.
Add Text
- Add a blank line above My Hobbies
.
[With the cursor at the start of the line, press the ENTER key.]
- Apply the style Normal to the blank line.
[With the cursor in the blank line, choose Normal from the Style
drop-down list.]
This changes the height of the blank line slightly.
- Starting on the blank line you just added, type:
| My Job I am a travel agent for World Travel in
Buenos Aires, Argentina. I spend my work day talking to people about
where they want to go and trying to get them the best prices on
their tickets and hotel rooms.
I also write and edit our email newsletter Here and There, which
keeps our customers informed about special deals and news in the
travel industry.
My Education
I grew up in Buenos Aires and went to public school. I studied
business at the Universidad de Buenos Aires and graduated in 1985.
In my job as a travel agent I have really needed the history and
geography that I learned (or should have learned) in school - even
though I was not interested at the time!
My Family
I married my beautiful Carla in 1986. We have two children -
Ricardo who is 10 years old (our soccer star!) and Rosa who is 7
years old (our ballerina). |
- Apply the style Heading 3 to the lines
My Work , My Education
, and My Family .
Save As
You can save an HTML file with a different name or to a
different location on either a web server or a local drive by using the
command | .
-
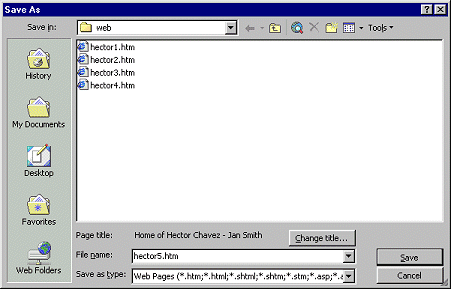 From
the menu select |
. From
the menu select |
.
 In the line Page Title you
should see Home of Hector Chavez - your name
but, of course, you should see your actual name instead of "your name".
You can make changes by clicking the Change title... button. In the line Page Title you
should see Home of Hector Chavez - your name
but, of course, you should see your actual name instead of "your name".
You can make changes by clicking the Change title... button.
-
 Type the path a:\my docs\web\hector5.htm
in the textbox File name or and click the Save
button to save to your web folder.
Notice that only files with the extension htm or html
are showing because of the choice in the textbox Save as type .
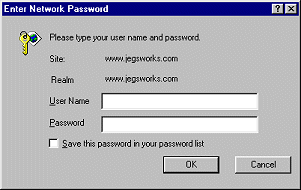
 Suppose you wanted to save
directly to a web site. (This is not usually a good idea!) You can
type the full URL in the File name textbox. You will get a login
dialog box where you will have to fill in the username and password. Suppose you wanted to save
directly to a web site. (This is not usually a good idea!) You can
type the full URL in the File name textbox. You will get a login
dialog box where you will have to fill in the username and password.
Usually you will want to save to your local copy of the web and let
FrontPage publish the changes. This lets
FrontPage do its tracking magic.
View HTML
- Switch to HTML view using the button at the bottom of the
document. You can see your new text with the helpful colors and spacing.
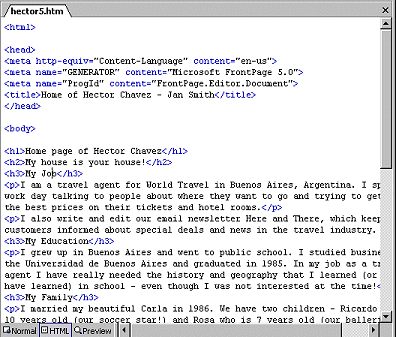
- Scroll this window to see how the whole page of code looks.
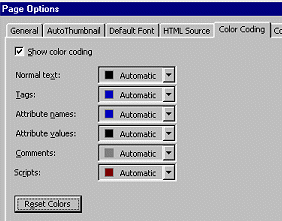  Change
colors: You can change the color coding. From the menu, choose
| | tab. Change
colors: You can change the color coding. From the menu, choose
| | tab.
- From the menu select |
.
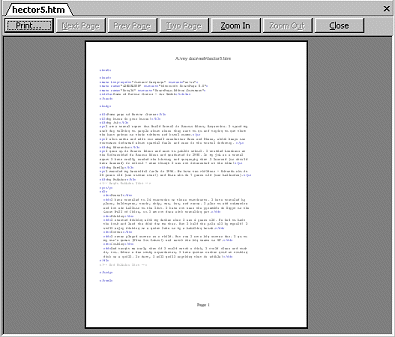
 Print
the HTML source code by clicking the Print... button on the
toolbar. Print
the HTML source code by clicking the Print... button on the
toolbar.
 A comment will print when you print
the HTML source from FrontPage. It won't show or print from Normal view
or from a browser. A comment will print when you print
the HTML source from FrontPage. It won't show or print from Normal view
or from a browser.
- Switch back to the Normal view window.
Preview in Browser
Always check your page in the browser before you decide that you are
finished. Even the Preview view in FrontPage does not always look quite
the same as the page looks in Internet Explorer. Try different window
sizes check how your text wraps. (This is very important if the page
includes images!)
-
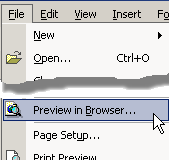 From
the menu select |The Preview in Browser dialog appears. You will see choices for
each of the browsers you have installed and for several window sizes. From
the menu select |The Preview in Browser dialog appears. You will see choices for
each of the browsers you have installed and for several window sizes.
 You can only have one
version of Internet Explorer installed at a time. You can only have one
version of Internet Explorer installed at a time.
-
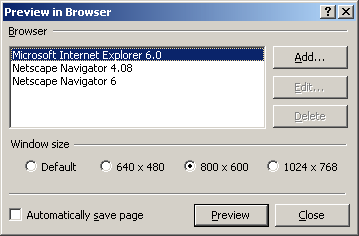 Select
your browser and window size and click on the
Preview button. Select
your browser and window size and click on the
Preview button.
  The
page must be saved before you can preview the page. If the box for
Automatically save page is not checked,
you will see a message box asking if you want to save. If you choose No,
you won't get a preview. The
page must be saved before you can preview the page. If the box for
Automatically save page is not checked,
you will see a message box asking if you want to save. If you choose No,
you won't get a preview.
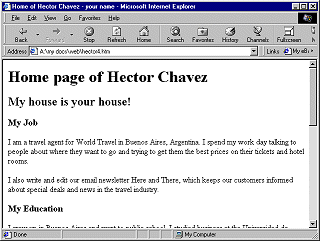 The
page displays with the white background because of the choices you made
in Web Project 1: Browser Basics ( |
| | ). Some
browsers use gray as the default background. The
page displays with the white background because of the choices you made
in Web Project 1: Browser Basics ( |
| | ). Some
browsers use gray as the default background.
- Scroll to see how the whole page looks.
- Resize the window to see how the text wraps at different
window sizes.
(With the window NOT at maximum size, drag a corner or a side of the
window.)
- Switch back to FrontPage.
Page Setup
-
 From
the FrontPage menu select |
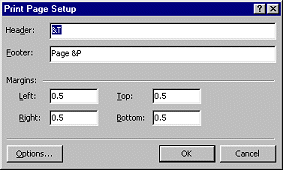
The Page Setup dialog opens. The
illustration shows the default settings. From
the FrontPage menu select |
The Page Setup dialog opens. The
illustration shows the default settings.
 The &T inserts the <title> text.
&P inserts the page number of the printed page. Other codes that work in
Notepad's Page Setup don't work here. Go figure! The &T inserts the <title> text.
&P inserts the page number of the printed page. Other codes that work in
Notepad's Page Setup don't work here. Go figure!
 The settings in this dialog apply
to all pages printed from FrontPage. Remember to check the
settings before printing. The settings in this dialog apply
to all pages printed from FrontPage. Remember to check the
settings before printing.
-
 In
the Header textbox, type after &T the name of the file:
hector5 In
the Header textbox, type after &T the name of the file:
hector5
- In the Footer textbox, type after the &P the current
date. Unfortunately FrontPage won't do the date automatically for you.
- Click on OK to close the dialog.
Print Preview & Print
- Click the button
 Print
Preview to see how this page will print. Print
Preview to see how this page will print.
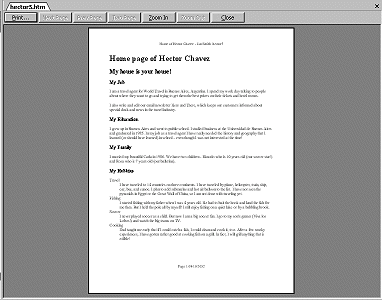
- Move the mouse pointer over the page. It changes to the shape
 . .
- Click on the page to enlarge the view.
- Check that:
- the header is going to print correctly with the Title and
filename.
- the footer has the page number and the current date.
 The top and bottom margins must be
tall enough to hold your text. If not, your letters may be cut off or
not show at all. The top and bottom margins must be
tall enough to hold your text. If not, your letters may be cut off or
not show at all.
 If you have a few lines on a
second page, you may be able to get it all on one page by changing the
left and right margins in Page Setup to a lower number. If you have a few lines on a
second page, you may be able to get it all on one page by changing the
left and right margins in Page Setup to a lower number.
 Click
on the Print button to print the document hector5.htm. Click
on the Print button to print the document hector5.htm.
 The changes you
made to Page Setup will apply the next time you print a page! Don't forget
to change the file name and date! The changes you
made to Page Setup will apply the next time you print a page! Don't forget
to change the file name and date!
|
 Edit
Edit
![]()
![]()